
1. Give the fight an objective
Prepare one scene in which the characters can change something. Decide what each side wants, what the players can see, and what ends the conflict. Use the DM Session Prep Checklist to place this encounter inside the whole game night; this walkthrough focuses on the fight itself.
Reedcross ferry yard: recover the lantern lens
The medicine ferry cannot leave safely without its signal lantern. Two lookouts hold the missing lens near a stack of crates. The party wants the lens and a clear route to the ferry; the lookouts want payment and a way out. The players can negotiate, distract them, take the lens, or fight. If the lookouts surrender or flee, combat can end before every opponent reaches 0 HP.
Write three lines in the session’s private notes: objective — recover the lens; pressure — the ferry is loading; ending — the party secures the lens or agrees another workable signal. The loading ferry is a narrative pressure you adjudicate, not a timer NAT420 starts automatically.
This is an original teaching scene. The demonstration opponents and screenshots show the controls; their number is not a universal recommendation for your party. Check attendance, character level, current resources, and your group’s rules before using it.
2. Inspect and select the monsters
- Enable Dungeon Master controls in Settings and open Bestiary. Search for a creature that can perform the lookout’s role; the illustrated example uses two Bandits from the open reference.
- Open the stat block. Read its source, HP, AC, movement, attacks, and unusual abilities. Decide what the lookout will do on its first turn and when it will retreat. A creature’s name alone does not tell you how it fights.
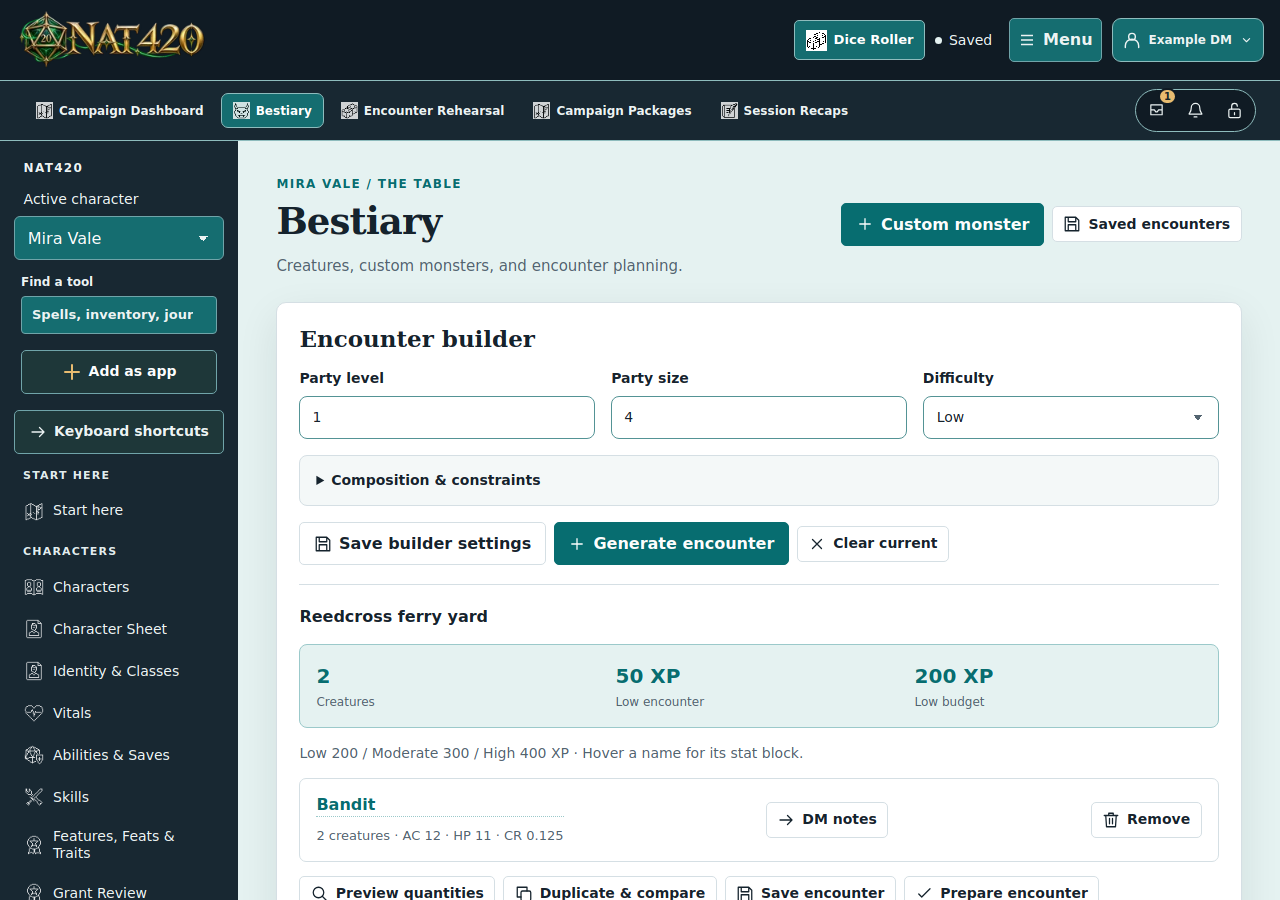
- Use the encounter builder to add the chosen creature and review its quantity. Set the party size and level for the people actually attending. Save the setup with a recognizable name, such as Reedcross ferry yard.
- Choose where you will run it. For a solo practice tracker, Send to initiative in the stat block opens the quantity review, then Add to initiative appends those opponents to your personal setup. For a shared game, open Party Lobby and use Choose monsters or import the prepared encounter through the available review controls.
Preparing opponents does not roll their initiative. Inspect the existing roster before adding the same selection twice. Start with a composition whose actions you can explain; add complexity when you can run the first version confidently.
3. Read the budget, then examine the actual risk
NAT420’s builder reports Low, Moderate, High, or Above High using the 2024 / SRD 5.2.1 raw-XP budgets. It totals each selected monster’s XP multiplied by its quantity; it does not apply the 2014 creature-count multipliers. If your group uses the older encounter method, check that method separately rather than treating the labels as interchangeable.
A budget check, not a promise
For four level-1 characters, SRD 5.2.1 gives a Low budget of 50 XP per character: 4 × 50 = 200 XP. Compare your actual selected creatures’ total with that budget. A total below the limit still needs review; difficult terrain, concentrated attacks, an injured party, or a disabling ability can change the experience.
| Check | What to change or prepare |
|---|---|
| Attendance and resources | Reduce or replace threats when a player is absent or the party has spent its healing and major abilities. Recheck size and level before saving. |
| Number of enemy turns | Look at how many opponents can act before a vulnerable character acts. Review the builder’s warnings rather than adding many small creatures just because they fit. |
| Damage and special abilities | Read the strongest single action, range, and any effect the party cannot readily answer. Prepare a visible retreat route or a negotiated ending when it fits the scene. |
| Terrain and information | Decide what is visible, reachable, or concealed. A chokepoint or a protected ranged opponent can matter more than its position in the budget. |
A generated result is a draft to inspect, not approval to run it unchanged. The checklist’s scene-preparation step brings these decisions together with NPC motives and the wider quest.
4. Make the terrain useful and readable
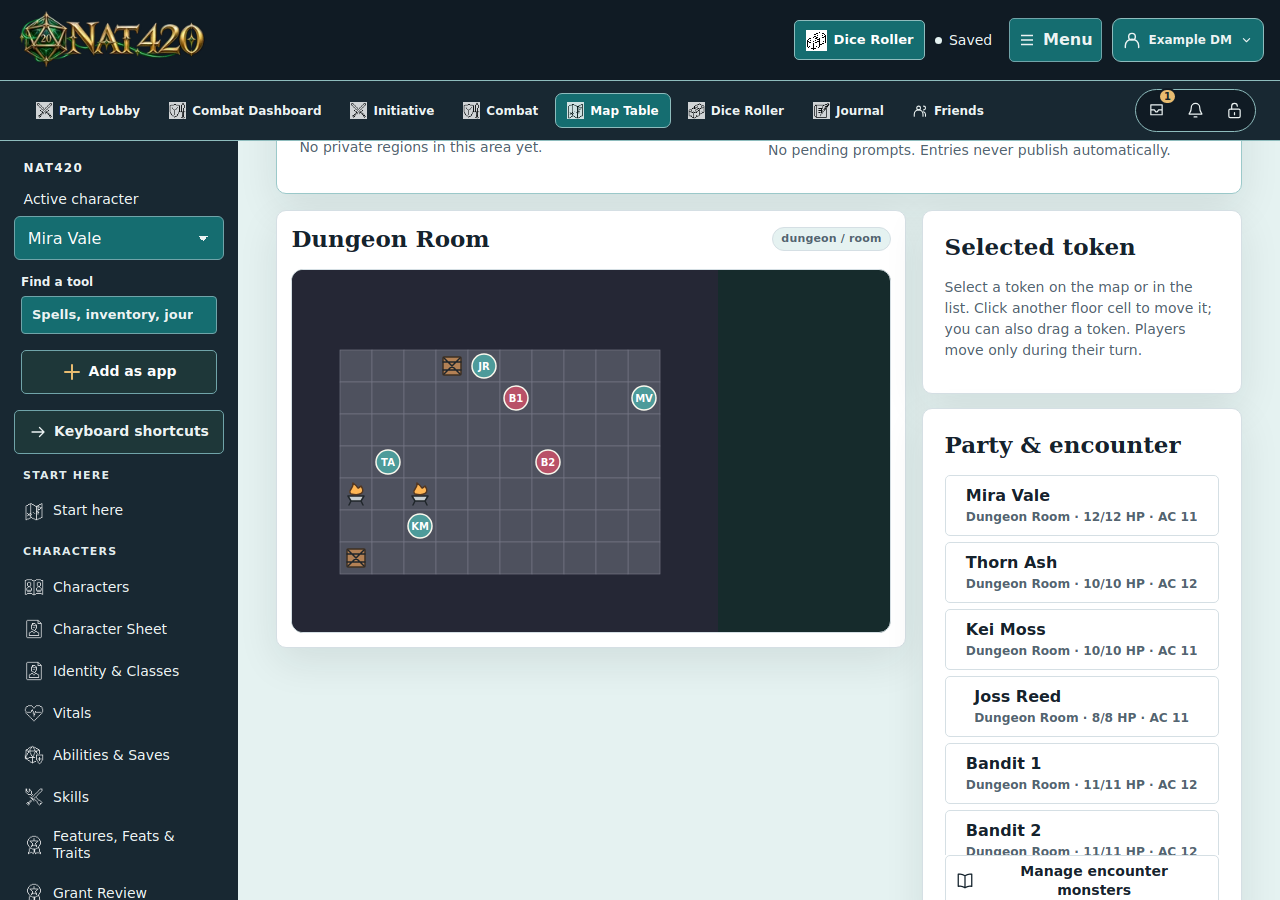
A small sketch or a spoken description is enough if exact positioning does not matter. If it does, open Map Table from the shared lobby. Prepare the area, inspect where the participants will start, and check the player preview before play.
| Feature | Decision it offers | What the DM must settle |
|---|---|---|
| Crate stack | Move around it, climb it, or use it to interrupt a line of sight. | Its height, stability, and any cover or climbing ruling under your chosen rules. |
| Yard gate | Hold the entrance, leave it open for the ferry crew, or move through another route. | Whether it is open, locked, damaged, or simply decorative. |
| Lantern platform | Take the lens there, bargain with a lookout, or improvise a signal. | How to reach it and what would make the signal work. |
- Give the area a name you can find during play. Keep the first layout small enough to understand at a glance.
- Review environmental features. Use their available show, hide, add, or remove controls deliberately. A crate symbol is an illustration; it does not automatically award cover or resolve an interaction.
- Check Fog of War. New maps begin with fog off. Enable it before players rely on concealment, then inspect the player preview; a hidden DM note and an unexplored map area are different kinds of information.
- Describe the visible entrance, exit, obstacles, and objective aloud. Players should be able to make a decision without guessing what a symbol means.
5. Review the roster and begin initiative
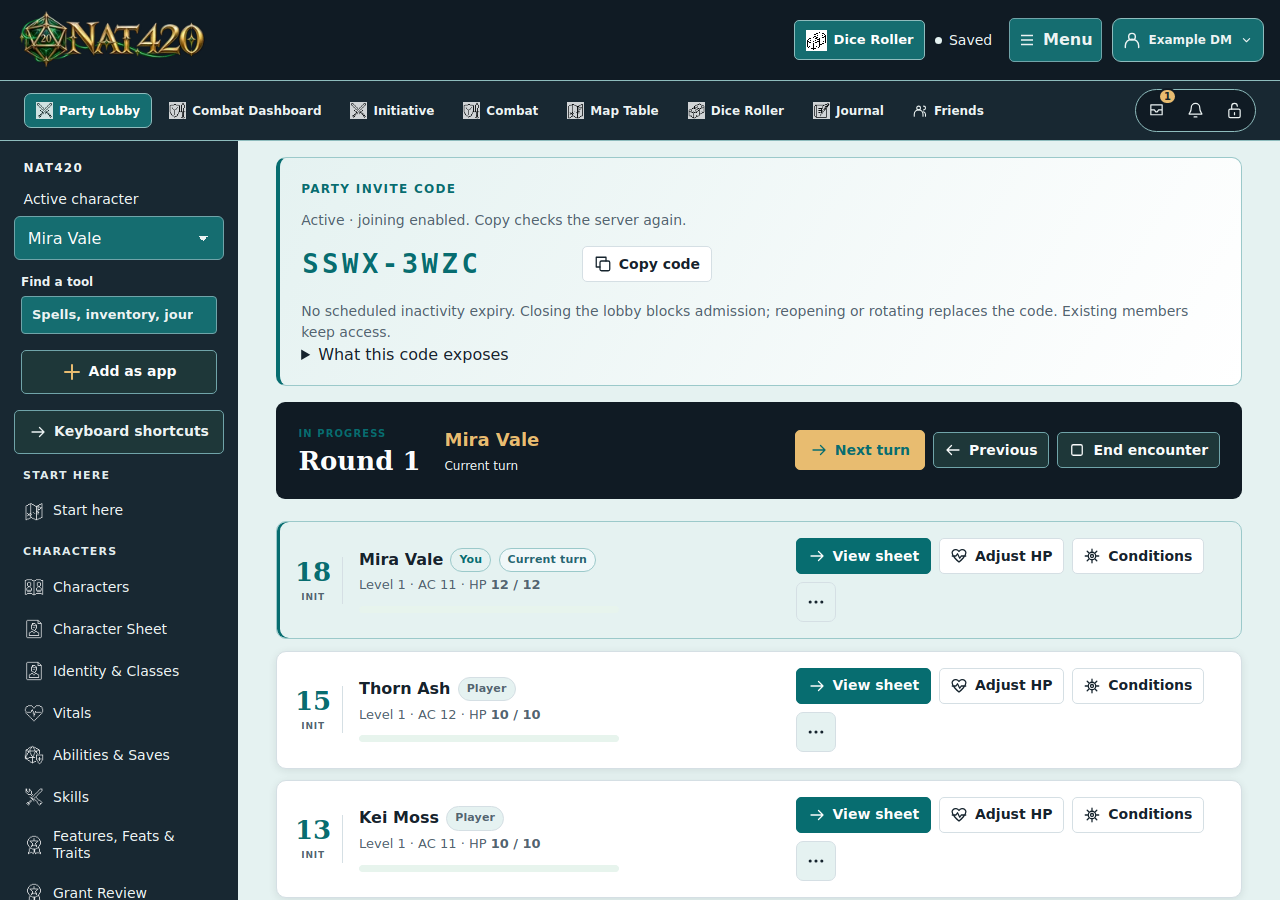
Use the Party Lobby guide for admission and character selection. Your personal Initiative setup is separate from the shared lobby; opening one does not publish it into the other.
- Confirm the attending characters, opponents, and any ally that needs a turn. Check names, current/max HP, AC, and starting conditions. Do not add every conversational NPC to the roster.
- During shared setup, let players use their own initiative control, or use the DM’s Roll for all. Confirm the intended roll audience when prompted. In personal Initiative, use the corresponding setup controls.
- Review the order before beginning. New participants start at initiative 0; adding them is not a roll, and 0 can also be a legitimate rolled result. Check the recorded result if uncertain.
- Choose Begin encounter in the lobby, or Begin combat in personal Initiative. Open Combat Dashboard for the shared fight and identify the current actor and round.
If a participant joins during active combat, review its initiative explicitly. Do not reroll everyone simply to insert a newcomer. Start new combat, reset, and replacement controls are deliberate setup changes; inspect their review before replacing work you intend to keep.
6. Run one turn completely before advancing
State the visible situation: “The lens is beside the crates, the ferry crew is waiting at the gate, and one lookout is moving toward the platform.” Ask the current player what they intend to accomplish. Resolve the required movement, attack, check, save, or spell using the group’s rules, then record the agreed outcome.
- Choose and explain the action. The owner uses their character’s attack, spell, or resource controls. The DM uses the creature’s available attack controls. Read the target and relevant values before rolling.
- Review the result. A creature attack roll still needs explicit hit/miss and damage review before encounter damage is applied. Check critical components, defenses, and any table ruling; the displayed total does not decide every outcome.
- Record only what happened. Update the intended participant’s HP or conditions. For spell effects, handle the relevant duration or concentration prompt separately. The concentration and durations guide explains the tracking workflow.
- Finish the turn. Ask whether the player has anything left to resolve. Choose Next turn once, then confirm the next actor and round. Advancing the order is not a substitute for resolving a pending effect.
One resolved outcome
Mira’s player describes driving the lookout away from the lens. After the table resolves the attack, record the agreed damage on that lookout’s encounter row. If it drops the lens and retreats, update the fiction as well: the party can recover it without defeating the second lookout. The tracker records mechanics; your session notes record that decision.
After a connection interruption, check the action’s saved status before repeating it. Repeating a roll or damage application without checking can produce a different result or a second change.
7. Make corrections from the recorded state
Pause the table when an entry is wrong. Identify the exact participant, the intended value, and whether the action was confirmed. A correction should leave everyone with the same understanding of what happened.
| Situation | Review before confirming |
|---|---|
| Damage went to the wrong row | Open Combat history, inspect the recorded change, and use an eligible correction when offered. Read the proposed reversal; then apply the agreed result to the intended actor. |
| Next turn was accidental | Use the available turn/history correction and check the actor and round. Returning to an earlier turn is not a promise to rewind spell time, dice results, or every intervening action. |
| The save was interrupted | Use the displayed status or reload controls to find the confirmed state. An unconfirmed response may already represent a committed action. |
| Encounter HP differs from the sheet | Review saved-versus-encounter values in Combat Dashboard. The owner chooses the available reconciliation direction and confirms the intended values. |
Not every historical action remains eligible for reversal. Later changes or permission changes can invalidate a correction. If the tool cannot safely reverse it, agree the current state with the table and make a supported explicit adjustment. Record the reason in the session notes.
8. End the scene, then handle rewards
- Choose End encounter when the conflict’s ending condition is met. Review surviving opponents, ongoing conditions, and each character’s encounter-versus-saved values.
- Record the objective’s actual result in Campaign Dashboard. Completing a quest or ending combat does not automatically award coins, items, or character advancement.
- If the DM grants a shared reward, open Party loot, check for an existing entry, and review the intended recipients. A currency reservation is not a confirmed character movement; follow the party loot guide for claims and remainders.
- Apply your table’s agreed XP or milestone approach separately, then note it. Rewards may follow the objective, negotiation, or another outcome; they are not inferred from the number of defeated creatures.
What Reedcross actually earned
The party restored the signal and got the medicine aboard. The DM grants 17 gold pieces and Sella’s offer of a boat next session. Record the payment once and the promise in Sella’s NPC record. If the party agreed to split coins differently, preserve that agreement instead of assuming an equal split.
Use the sample recap and notes workflow to retain the result, one unresolved question, and the next lead. Then return to the checklist’s rewards and recap stage to finish the session.
9. Rehearse the prepared encounter before game night
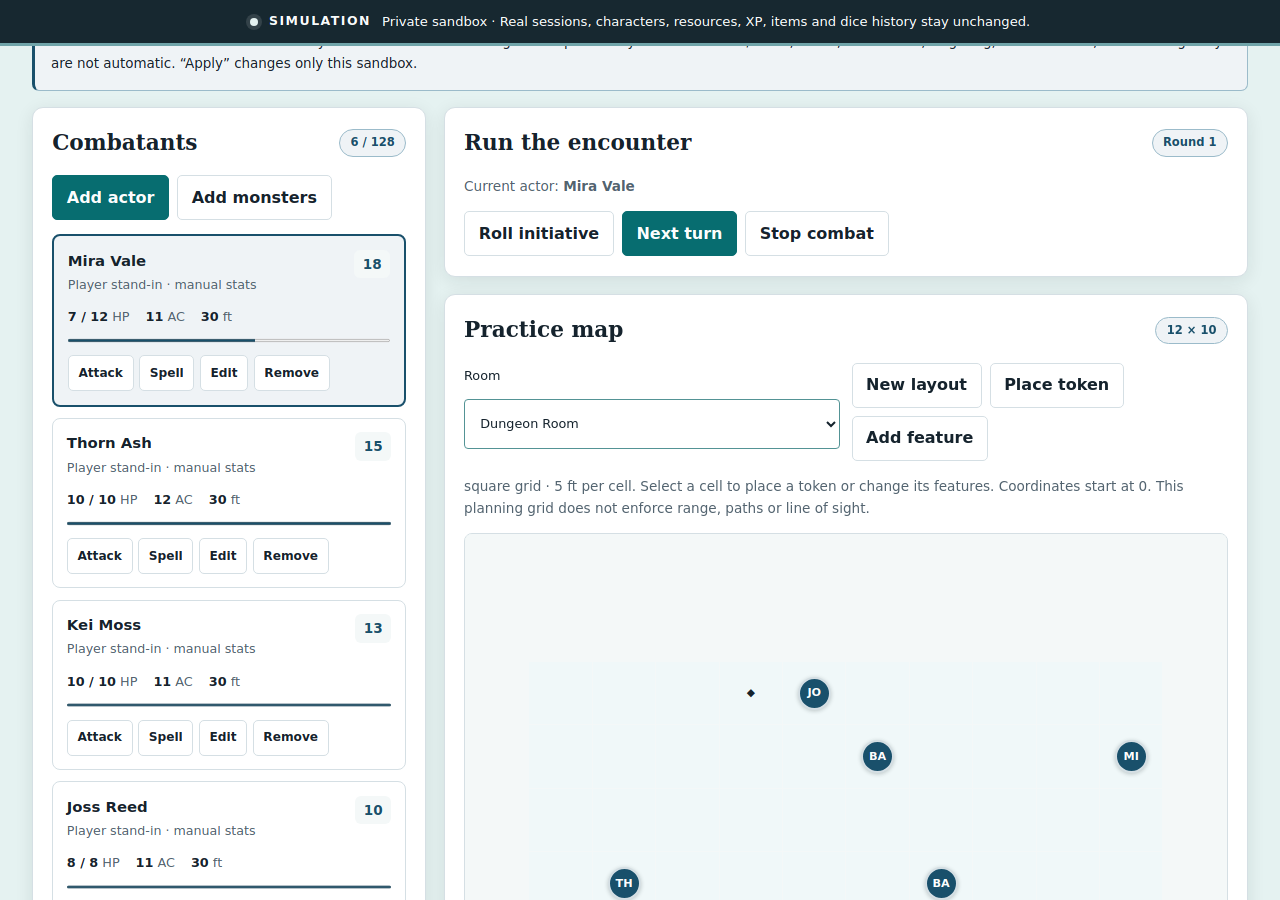
Encounter Rehearsal is a private, temporary sandbox for the owning DM. It can copy an available prepared encounter or owned open party table into a separate simulation. It does not send test damage to saved sheets or turn its results into live rewards.
- Save the encounter or prepare the owned lobby first. Open Encounter Rehearsal and choose the intended source. Choose Preview exact source, review it, then choose Create private sandbox.
- Check the copied actors and any copied map. Player actors are manual stand-ins; saved-sheet features and real resources are not imported. If the prepared source contains only monsters, add the test participants needed to explore your intended party; use their real current statistics as your planning reference and enter test resources deliberately.
- Try an opening position, a difficult first turn, and an alternative approach. Use the simulation controls to inspect actor HP, order, and resources. Keep track of assumptions that you entered manually.
- Use Reset rehearsal when you want to retry the copied starting point. When finished, choose Discard sandbox. Write useful changes in private preparation and apply any chosen live changes through the normal tools separately.
A rehearsal is a manual test, not an automatic combat AI or proof of encounter balance. The sandbox is temporary, expires, and is tied to current source access. It is not a durable backup of your prepared encounter. Its best result may be a simple note: “Move the lens closer to the gate so the objective is reachable in the first round.”
Return to three tasks for the next session with the revised objective, roster, and terrain plan.
Rules references and walkthrough scope
Difficulty terminology and the level-1 budget example follow SRD 5.2.1, Combat Encounters, printed pages 202–203. Consult Combat, printed pages 13–18 for the underlying rules. Use your table’s chosen edition for stat blocks and adjudication. See Sources & attribution for SRD credits.
All scenes, character names, and campaign records in the illustrations are fictional demonstration data captured from NAT420. No real player record is published by this guide.